buon sabato a tutti!
oggi finalmente vi spiego come realizzare un' accessorio da sirena con una semplicissima conchiglia!
Io per questa serie ho utilizzato la conchiglia di una capasanta perchè volevo ottenere un' accessorio ben visibile ma voi potrete realizzarlo con qualsiasi tipo di conchiglia.
***
happy saturday!
finally today I will explain how to make a mermaid accessory with a simple shell!
I used a scallop shell for this series because I wanted an eye-catching accessory but you can make it with any type of shell.

conchiglia, acrilico bianco, smalto colorato, spugna, brillantini, colla vinilica, colla a caldo, molletta di metallo
***
you need:
shell, white acrylic, colored nail polish, sponge, glitter, glue, hot glue, metal pin

1) prendete l' acrilico bianco e dipingete tutta la conchiglia, fate asciugare e ripassate il bianco fino ad ottenere un bianco omogeneo.
***
1) take the white acrilic and paint all the shell, let it dry and repaint until until you get a homogeneous white.


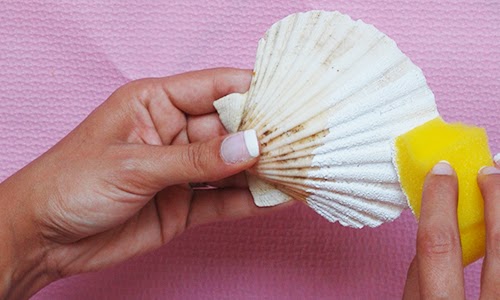
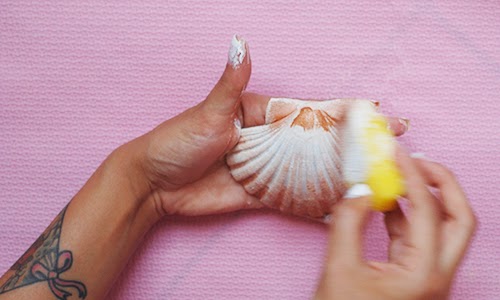
2) stendete ora lo smalto alle due estremità della conchiglia e sfumate verso il centro con la spugna per dare volume. Anche in questa fase è necessario ripassare il colore più volte fino a quando non ottenete la tonalità di colore che desiderate.
***
2) take now the colored nail polish and put it at the two ends of the shell and shaded towards the center with the sponge for give volume. Repeat this step until you get the intensity of the color you want.


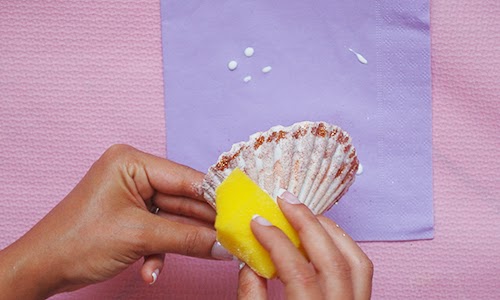
3) prendere ora la colla vinilica e stendetela all' estremità della conchiglia applicate ora i brillantini e stendeteli su tutta l' estremità. Lasciate asciugare
***
3) take the glue and put it at the two ends of the shell, put now the glitters and apply it on all the edge. Let it dry


4) Girate la conchiglia applicate la colla a caldo e incollate la molletta in metallo, lasciate asciugare e... abbiamo finito!
***
4) Turn the shell put hot glue and glued the metal pin, let it dry and.... we finished!

Oddio l'ho capito dopo che nella prima foto c'è una ^___^ che spavento :D
ReplyDeleteQuesto accessorio è davvero carino, lo sai? Penso proprio che raccoglierò un po' di conchigliette per farlo, anche se devo dire che quelle delle capesante sembrano perfette.
Grazie per il tutorial :*
Giuliedda
*c'è una testa finta
Deletedimenticata ^__^
eh si lui è il mio portaparrucca ufficiale è un tipo silenzioso e paziente XD
DeleteMolto carina, e ricordo che a te sta molto bene :)
ReplyDeletegrazie :)
Deletewhaaaaa i tuoi capelli erano un barbatrucco?! haha cascata in pieno ;) bellissimo il tutorial!
ReplyDeleteeh già! Grazie :)
Deleteche bella *_*
ReplyDeletegrazie per il tutorial <3
Che carina come idea devo provare assolutamente :)
ReplyDeletecomunque ogni volta che entro in questo blog mi ri-innamoro della grafica,
veramente brava complimenti *:*
Another earth pink
grazie Valentina!
Deleteoh my god, this is so cute! I'm soooo going to try this myself! I always wanted to be a mermaid hihi :)
ReplyDeletexx
we are all mermaid here hihihi ;P
DeleteWow,so amazing beautiful.*__*
ReplyDeleteI really like your pretty blog. Maybe follow each other on bloglovin?
Let me know follow you then back.
Lovely greets Nessa
Che idea fantastica che hai avuto :D
ReplyDeleteMi piace un sacco!!
grassie <3
Deletesemplice e carina!
ReplyDeletegrazie!
Deletela trovo stupenda e davvero versatile ^^ grazie per questo tutorial... ora purtroppo non ho il materiale necessario per mettermi all'opera, ma è di sicuro una meraviglia da mettere nella mia to do list :)
ReplyDeletegrazie! In realtà con un pò di fantasia può diventare anche una collana o una spilla :)
DeleteReally pretty! Great idea :)
ReplyDeleteBella / everythingaboutbella
Bell'idea.................
ReplyDeleteMa: quindi come sono i tuoi capelli??????????
Ora son curiosa :/