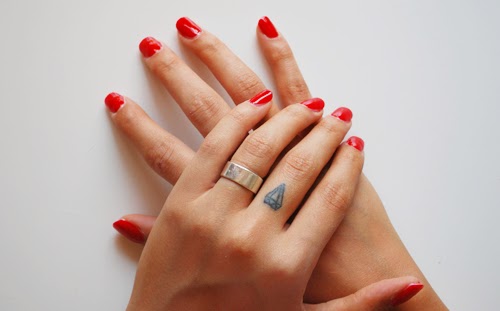
Ciao a tutti oggi ho deciso di postare sul blog uno dei miei segreti più grandi: come faccio ad avere le unghie perfette. Ebbene dovete sapere che io non vado dall' estetista per la cura delle mie mani ma faccio tutto in casa risparmiando. E come fai? Vi chiederete voi, oggi sono qui per spiegarvelo!
***
Hello everyone today I decided to post on one of my biggest secrets: how do I get the perfect nails. You should know that I didn' t go to beauty therapist for my hands care but I do everything in the house saving a lot of money. And how do you do? You will ask me, I am here to explain it today!
Premise: my english is terrible so I hope the tutorial will be easy to understand, sorry I do my best
Occorrente:
- tips unghie
- colla per unghie
- lima sottile (240/280) e spessa (120/180)
- taglia unghie
- base sealer Essence "better than gel nails"
- top sealer high gloss Essence "better than gel nails"
- smalto (Kiko 240)
- top coat Essence "gel-look"
|
What you need:
- tips
- nail glue
- thin nail file (240/280) and thick (120/180)
- nail clippers
- base sealer Essence "better than gel nails"
- top sealer high gloss Essence "better than gel nails"
- nail polish (Kiko 240)
- top coat Essence "gel-look"
|
Per prima cosa dobbiamo scegliere le tips della dimensione giusta da utilizzare così da averle pronte per l' uso. Per ottenere un' effetto più duraturo è importante che le unghie al momento dell' applicazione delle tips siano ben pulite, vi consiglio quindi di pulirle da eventuali residui di smalto con l' acetone;
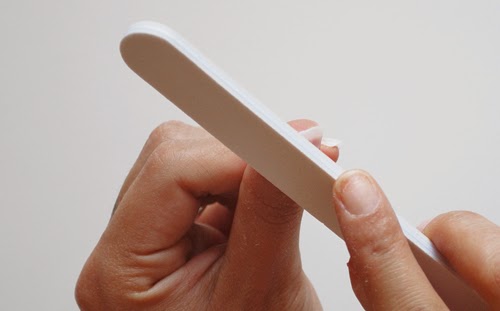
Prendete ora la lima più sottile ((240/280) e passatela delicatamente sull' unghia, questo aiuterà la colla ad aderire meglio.
***
First choose the tips of your size so they will be ready for later. To have a more lasting effect is important that your nails are clean my advice is to clean them well with some polish remover
Take now the thinner file ((240/280) and pass it gently on your nails, it will help the glue to fix better.
Ora prendete la colla e applicatela sulla punta della tip, attendete qualche secondo e poi fatela aderire alla vostra unghia naturale rimanete ferme per almeno 10-15 secondi fino a completa asciugatura. Utilizzate la stessa procedura completando entrambe le mani. Tagliate poi le tips della lunghezza desiderata.
***
Take now the glue and apply it on the tip, wait a few seconds and then put it on you natural nail and dont move for 10-15 seconds until completely dry. Use the same procedure as completing the whole hands.
una volta finito di tagliare le tips possiamo passare al prossimo step, prendete la lima più grossa (120/180) e iniziate a limare lo "scalino" tra l' unghia finta e quella naturale, mi raccomanto limate solo la tip! Usate la stessa procedura per entrambe le mani e definite con la lima la forma delle vostre unghie.
***
once you finished cutting the tips you can move on to the next step, take the bigger file (120/180) and started to file the "step" between the fake nail and natural one, be carfully to filed only the tip! Use the same procedure for both hands and defined with file the shape of your nails.
Applicate ora su tutte le unghie il base sealer Essence "better than gel nails" lasciatelo asciugare e poi passate il top sealer high gloss Essence "better than gel nails l' effetto che otterete è questo:
***
Apply now on all nails the Essence base sealer "better than gel nails" let it dry and then put the Essence top high gloss sealer Essence "better than gel nails you will get this effect:
Ultimo step (finalmente!) ovvero applicare lo smalto scelto e una volta asciugato usare come top coat il "gel-look" di Essence. Voglio precisare che questa è la mia tecnica personale, non è professionale è solo un modo per delle unghie perfette con prodotti low cost.
Spero vi sia piaciuto il mio tutorial e se avete qualche dubbio scrivetelo nei commenti, vi saluto con la foto del risultato finale, buon fine settimana!
***
Last step (finally!) now apply the nail polish chosen and the Essence "gel-look" as a top coat and let it dry. I want to clarify this is my personal technique it is not professional, is only one way for nail perfect nails with low-cost products.
I hope you enjoyed my tutorial and if you have any doubt write it in the comments, I greet you with a picture of the final result, have a nice week end!