home about me cute n roll design contact sponsor
Showing posts with label TUTORIAL. Show all posts

Friday, 28 June 2013

Nails: Gel nails without gel!

Ciao a tutti oggi ho deciso di postare sul blog uno dei miei segreti più grandi: come faccio ad avere le unghie perfette. Ebbene dovete sapere che io non vado dall' estetista per la cura delle mie mani ma faccio tutto in casa risparmiando. E come fai? Vi chiederete voi, oggi sono qui per spiegarvelo!
***
Hello everyone today I decided to post on one of my biggest secrets: how do I get the perfect nails. You should know that I didn' t go to beauty therapist for my hands care but I do everything in the house saving a lot of money. And how do you do? You will ask me, I am here to explain it today!
Premise: my english is terrible so I hope the tutorial will be easy to understand, sorry I do my best
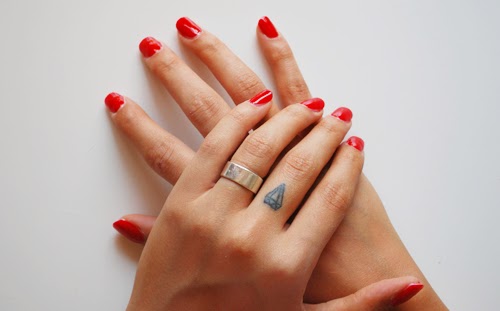

Nails gel without gel!

Occorrente:

  • tips unghie
  • colla per unghie
  • lima sottile (240/280) e spessa (120/180)
  • taglia unghie
  • base sealer Essence "better than gel nails"
  • top sealer high gloss Essence "better than gel nails"
  • smalto (Kiko 240)
  • top coat Essence "gel-look"


What you need:

  • tips
  • nail glue
  • thin nail file (240/280) and thick (120/180)
  • nail clippers
  • base sealer Essence "better than gel nails"
  • top sealer high gloss Essence "better than gel nails"
  • nail polish (Kiko 240)
  • top coat Essence "gel-look"


Nails gel without gel!

Per prima cosa dobbiamo scegliere le tips della dimensione giusta da utilizzare così da averle pronte per l' uso. Per ottenere un' effetto più duraturo è importante che le unghie al momento dell' applicazione delle tips siano ben pulite, vi consiglio quindi di pulirle da eventuali residui di smalto con l' acetone;
Prendete ora la lima più sottile ((240/280) e passatela delicatamente sull' unghia, questo aiuterà la colla ad aderire meglio.
***
First choose the tips of your size so they will be ready for later. To have a more lasting effect is important that your nails are clean my advice is to clean them well with some polish remover
Take now the thinner file ((240/280) and pass it gently on your nails, it will help the glue to fix better.

Nails gel without gel!

Ora prendete la colla e  applicatela sulla punta della tip, attendete qualche secondo e poi fatela aderire alla vostra unghia naturale rimanete ferme per almeno 10-15 secondi fino a completa asciugatura. Utilizzate la stessa procedura completando entrambe le mani. Tagliate poi le tips della lunghezza desiderata.
***
Take now the glue and apply it on the tip, wait a few seconds and then put it on you natural nail and dont move for 10-15 seconds until completely dry. Use the same procedure as completing the whole hands.

Nails gel without gel!Nails gel without gel!

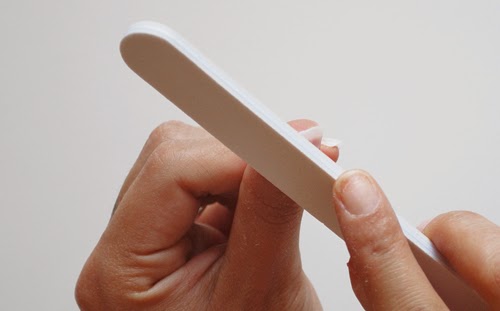
una volta finito di tagliare le tips possiamo passare al prossimo step, prendete la lima più grossa (120/180) e iniziate a limare lo "scalino" tra l' unghia finta e quella naturale, mi raccomanto limate solo la tip! Usate la stessa procedura per entrambe le mani e definite con la lima la forma delle vostre unghie.
***
once you finished cutting the tips you can move on to the next step, take the bigger file  (120/180) and started to file the "step" between the fake nail and natural one, be carfully to filed only the tip! Use the same procedure for both hands and defined with file the shape of your nails.
Nails gel without gel!

Applicate ora su tutte le unghie il base sealer Essence "better than gel nails" lasciatelo asciugare e poi passate il top sealer high gloss Essence "better than gel nails l' effetto che otterete è questo:
***
Apply now on all nails the Essence base sealer  "better than gel nails" let it dry and then put the Essence top high gloss sealer Essence "better than gel nails you will get this effect:

Nails gel without gel! Nails gel without gel!

Nails gel without gel!

Ultimo step (finalmente!) ovvero applicare lo smalto scelto e una volta asciugato usare come top coat il  "gel-look" di Essence. Voglio precisare che questa è la mia tecnica personale, non è professionale è solo un modo per delle unghie perfette con prodotti low cost.
Spero vi sia piaciuto il mio tutorial e se avete qualche dubbio scrivetelo nei commenti, vi saluto con la foto del risultato finale, buon fine settimana!
***
Last step (finally!) now apply the nail polish chosen and the Essence "gel-look" as a top coat and let it dry. I want to clarify this is my personal technique it is not professional, is only one way for nail perfect nails with low-cost products.
I hope you enjoyed my tutorial and if you have any doubt write it in the comments, I greet you with a picture of the final result, have a nice week end!

 Nails gel without gel!

Wednesday, 6 February 2013

DIY: wax tablecloth cluch bag / tutorial da tovaglia a cluch bag


L' altro giorno in un negozio ho visto questa bellissima tovaglia cerata e anche se non ne ho bisogno a casa ho deciso di comprarla poi l' idea, perchè non trasformarla in una clouch bag? E così ho preparato questo piccolo tutorial, ovviamente le dimensioni e la forma rimangono a vostro scelta, anzi mi piacerebbe vedere il risultato se ci provate!
Iniziamo
***
Omg my first english tutorial... please be patient my english make me and you cry I know!
Anyway the other day I see this beautiful wax tablecloch in a shop altrough I not needed I bought it... then the idea, why don't turn it in a cluch bag? And so I made this tutorial, obviously sizes and form are on your own choice, I'd liko to see your resoult if you try to make it!
Let's start

Thursday, 31 January 2013

Nails: Vintage roses nail art


Amo le stoffe vintage sopratutto quelle con stampe floreali, oggi infatti vi voglio spiegare come realizzare una semplice nail art con un effetto davvero bellissimo.
Dato che è la prima volta che uso questa tecnica ho deciso di seguire i colori suggeriti dal tutorial che ho trovato su pinterest (link al mio account se volete seguirmi)
***
I love vintage fabric expecially with floral stamp, today I want show you how do a really simple nail art with a super cute effect.
This is the first time I try  this technique so i decided to follow the tutorial's colors I've found on pinterest (link to follow me)

Thursday, 24 January 2013

Nails: Heart Shaped nails tutorial


San Valentino si avvicina e inevitabilmente ogni cosa diventa rossa e a forma di cuore... anche le unghie!
Più volte sul web ho visto foto di questo tipo di nail art e mi ha davvero affascinato, l' unica pecca e che per realizzarla al meglio bisogna arrotontare le unghie e questo non mi piace molto anche se l' effetto è veramente bello. Così ho sperimentato un pò e ho trovato questa tecnica.
***
Valentine's day is coming and inevitably everything tturns red and heart shaped... nails too!
several times on the web I've seen pic of this type of nail art and I was really fascinated, the only flaws is that for do it well you must have rounded nails and this what I don't really like altrhtough effects is truly cool
So I experimented a little and I developed this technique

Wednesday, 9 January 2013

DIY:Tutorial cuccia

New handmade bed
Avevo anticipato questo tutorial in qualche post fa ed eccomi qui a spiegarvi come realizzare una cuccia per cani (di piccola taglia) 0 gatti con un vecchio maglione. Ho visto questo tutorial in foto sulla pagina facebook di Cre@ndo & Gioc@ndo dove però non c' era una descrizione dettagliata, così entusiasta dell' idea mi sono messa all' opera per realizzare un nuovo lettino ai miei adorati cani, due per la precisione, quella che vedete in foto è Marilyn la mia chihuahua ha un' anno ed è la mia principessa che si è gentilmente offerta come modella. 

Saturday, 5 January 2013

DIY: Tutorial cintura con fiocco


Quante borse ho in giro per casa? Troppe e tante volte non le uso perchè non trovo accessori della stessa tonalita per poterle abbinare... beh mi sono ingegnata qualcosa per risolvere il problema (almeno in parte) utilizzando la tracolla che spesso e volentieri viene venduta con la borsa  che non utilizzo mai.
Related Posts Plugin for WordPress, Blogger...